Zapier Connection Guide
Connect Seamless with Zapier to automate the transfer of newly researched contacts and companies to thousands of supported applications. This guide walks through creating, testing, and publishing a Zap using Google Sheets as an example.
Zapier is a third-party automation platform that allows you to send contact and company information from Seamless to thousands of supported applications.
With Zapier, you can create automated workflows, called Zaps, that transfer newly researched records from Seamless to CRMs, spreadsheets, email platforms, communication tools, and other applications.
The Seamless connection with Zapier is a one-way connection. Information can be sent from Seamless to another application, but information from the destination application is not sent back to Seamless through the same Zap.
Duplicate records may occur depending on the destination application and the action selected when creating your Zap.

Pro-Tip
When a native Seamless integration is available for your CRM, we recommend using the native integration instead of Zapier. Native integrations are available for platforms such as Salesforce, HubSpot, Microsoft Dynamics, Pipedrive, Zoho, and Outreach.
Check out all available integrations available to connect Seamless to through Zapier here: https://zapier.com/apps/seamless/integrations
Ways to use Seamless with Zapier
Send records to other CRMs: Automatically transfer newly researched Seamless contacts or companies to a CRM that does not have a native Seamless integration.
Build and update prospecting lists: Add newly researched contacts or companies to applications such as Google Sheets to maintain a shared prospecting list.
Create email and marketing workflows: Send contact information to supported email or marketing platforms to prepare contacts for future outreach.
Before sending marketing communications, confirm that your workflow follows all applicable consent, privacy, and unsubscribe requirements.
Notify your team: Send notifications to applications such as Slack when a new contact or company is researched in Seamless.
Create tasks and follow-up activities: Use project management and productivity applications to automatically create tasks for newly researched prospects.
Before you begin
Before creating your Zap:
- Confirm that you can sign in to your Seamless account.
- Create or sign in to your Zapier account.
- Confirm that you have permission to connect the destination application.
- Research at least one contact or company in Seamless that can be used to test the trigger.
- Determine which Seamless fields should be sent to the destination application.
Connect Seamless to Zapier
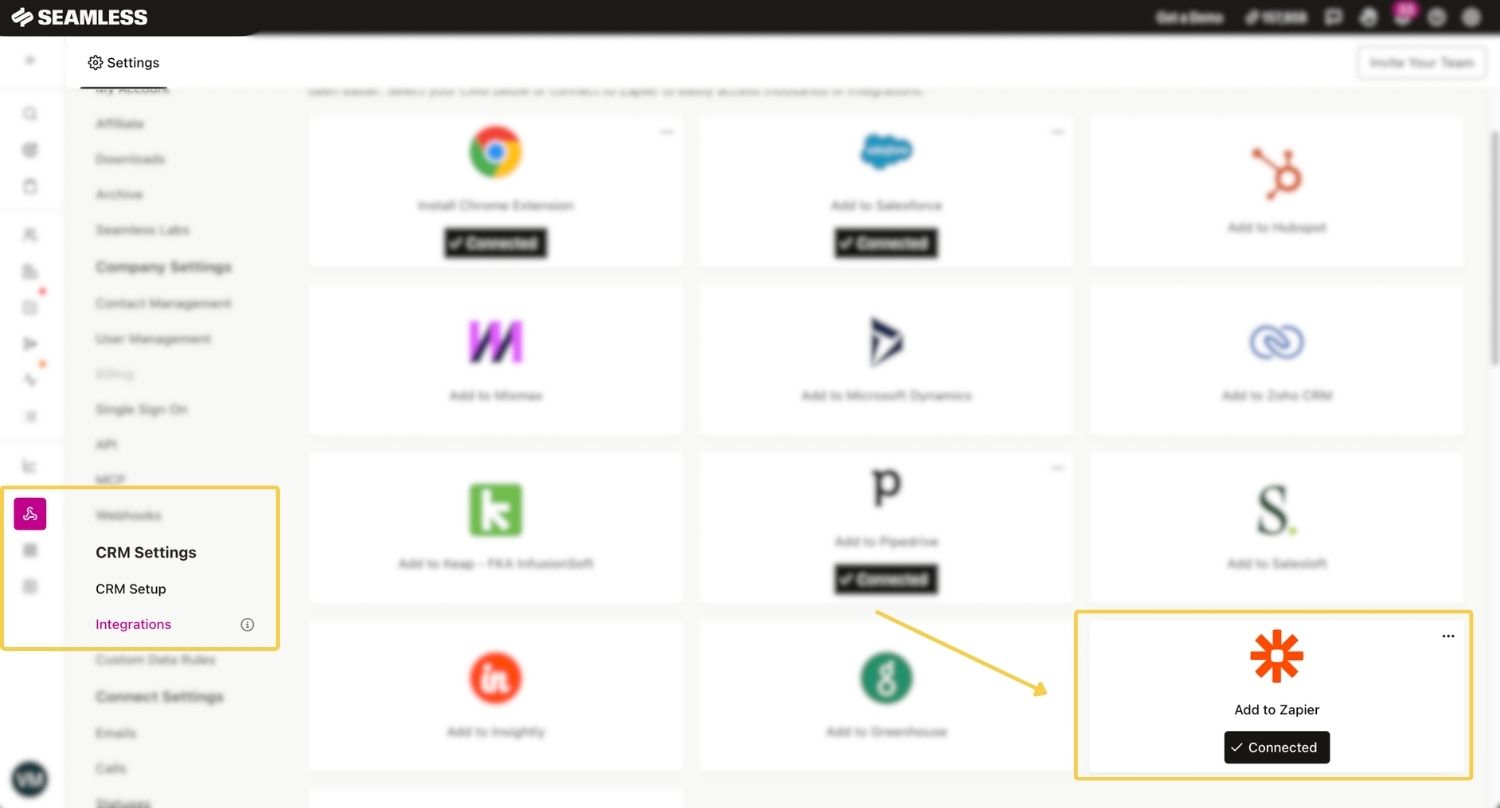
- Sign in to Seamless.
- Select your initials in the bottom-left corner.
- Select Settings.
- Open the Integrations page.
- Locate and select Zapier.
- Sign in to your existing Zapier account or create a new account.
You can also begin directly from Zapier by creating a new Zap and selecting Seamless as the trigger application.
Create a Zap
The following example walks you through how to send newly researched Seamless contacts to Google Sheets. Your setup may vary depending on the destination application and the outcome you want to achieve.
Step 1: Select the trigger
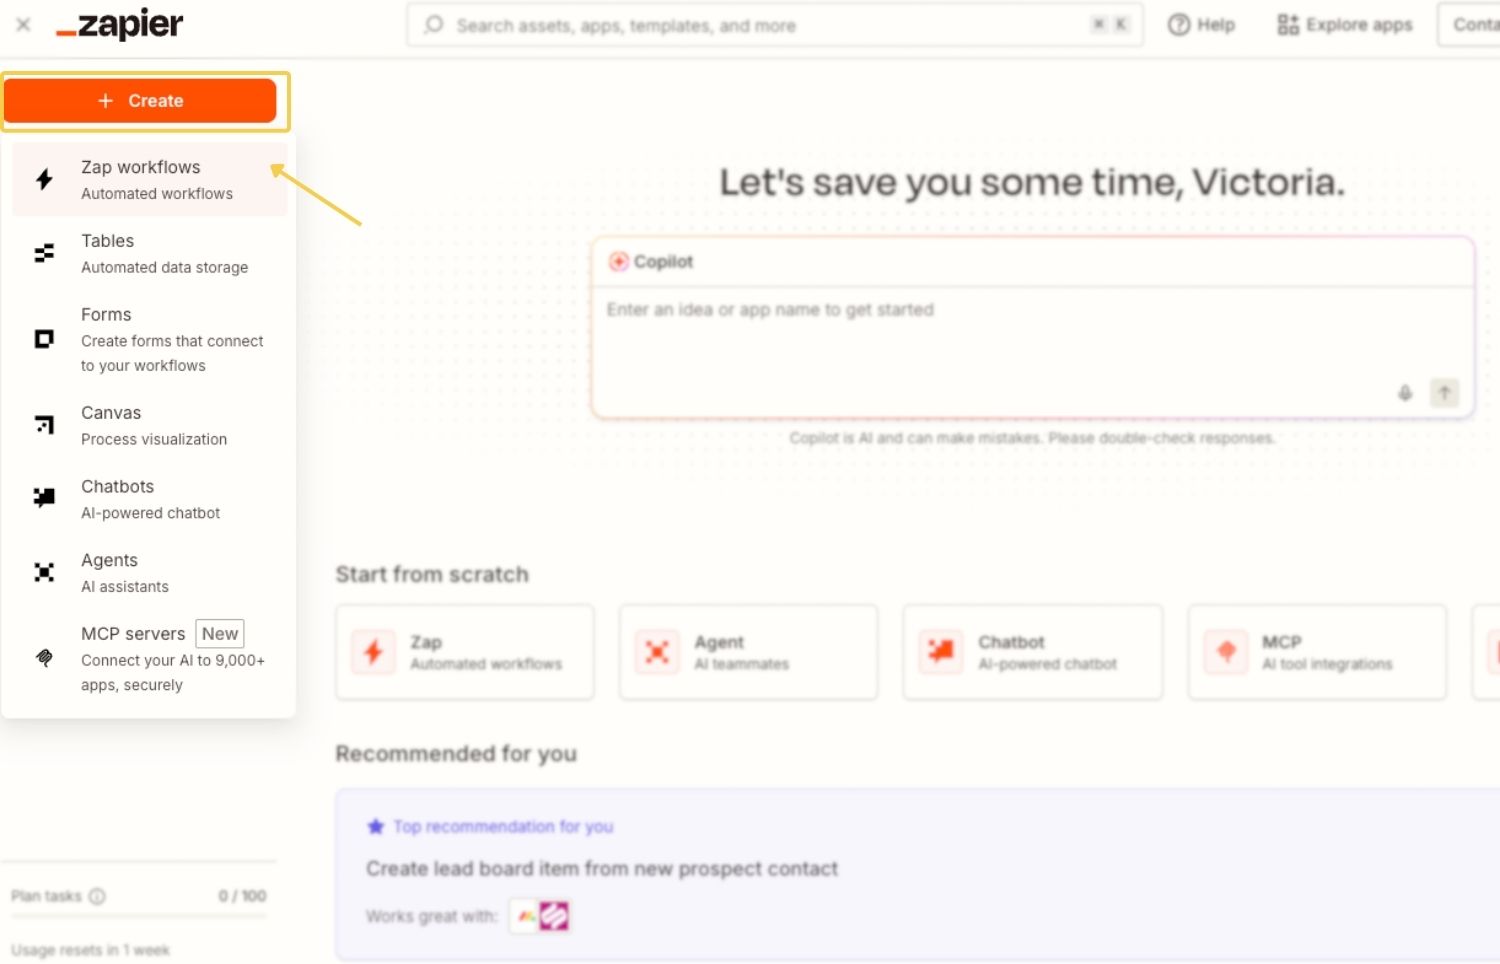
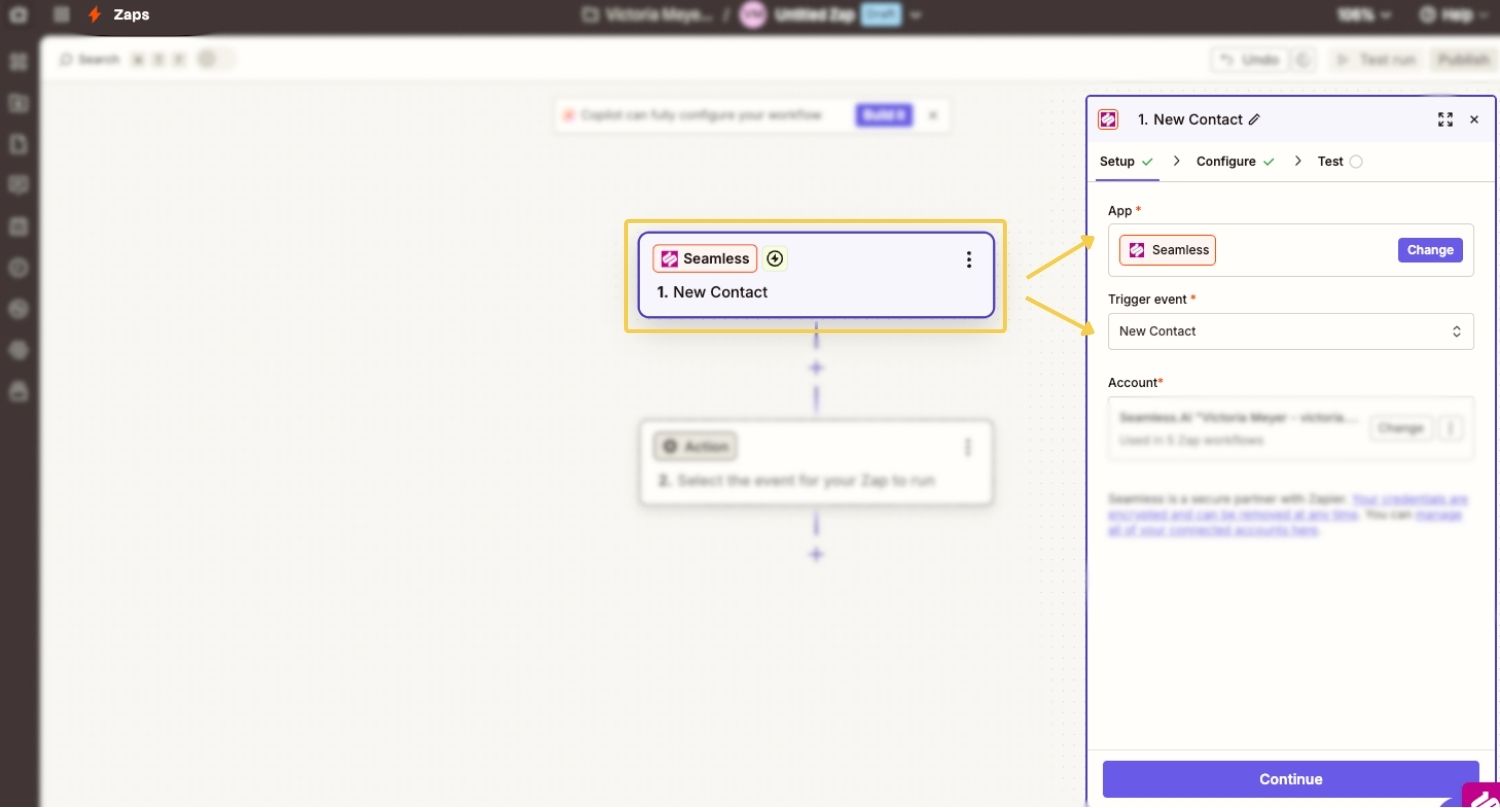
- From your Zapier account, select Create and create a new Zap Workflow.
- Select the Tigger step.
- Search for and select Seamless.
- Select New Contact as the trigger event. Or New Company depending on your goal.
- Connect your Seamless account.
- Select Continue.
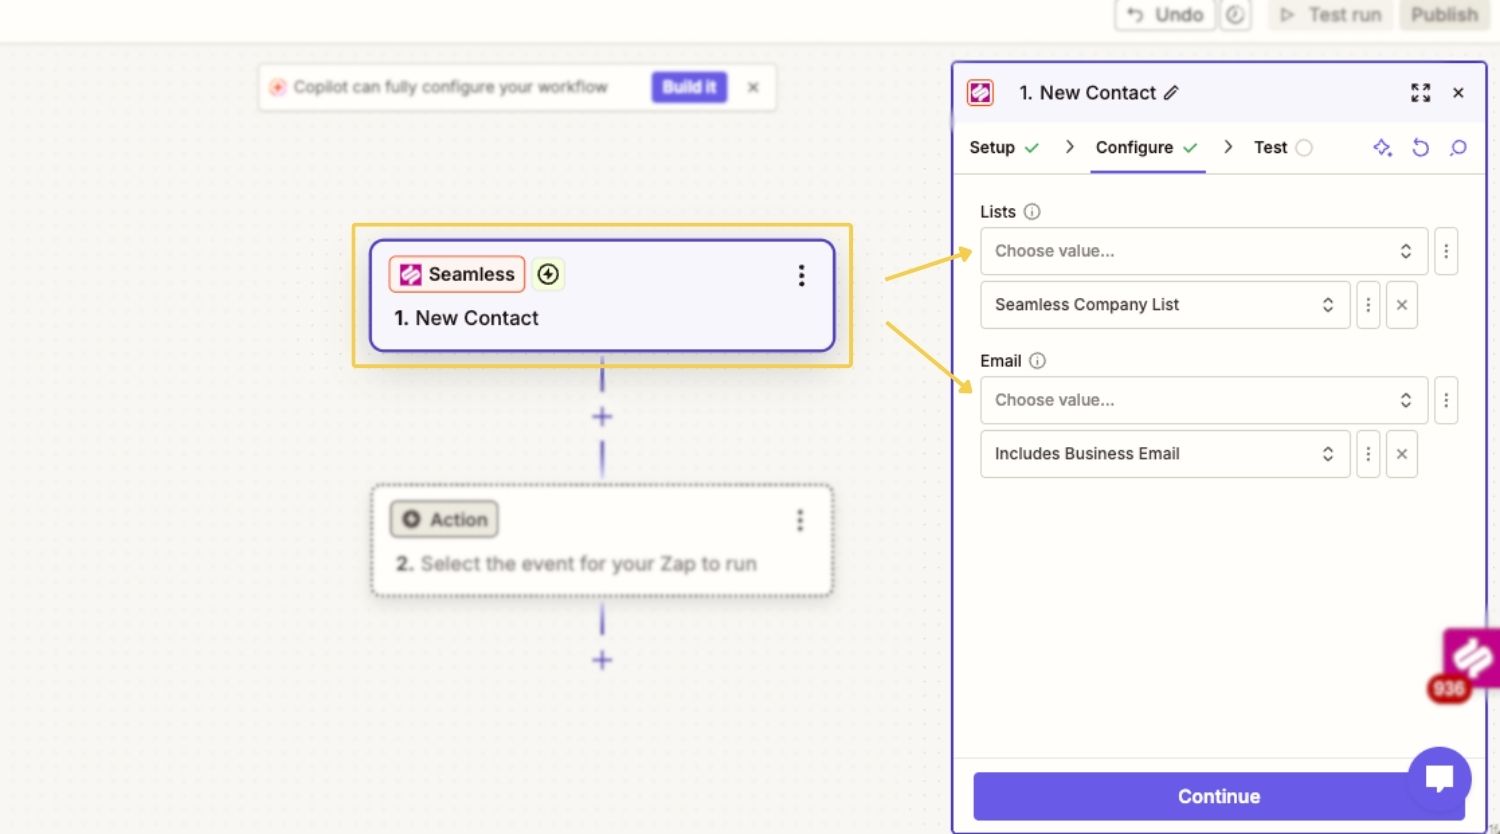
Step 2: Configure the trigger
Configure any optional trigger parameters that appear.
For example, you may be able to select a specific Seamless list or choose which email results should be included.
Leaving an optional field blank may allow the Zap to trigger for all qualifying newly researched contacts.
Select Continue after configuring your trigger.
Step 3: Test the trigger
- Open the Test section.
- Select Test trigger.
- Review the contact record returned by Zapier.
- Select the record you want to use and continue to the next step.
If Zapier cannot locate a test record, research a new contact in Seamless, confirm that it appears in My Contacts, and test the trigger again.

Configure the destination application
Step 4: Select an action
- Select the Action step.
- Search for and select Google Sheets.
- Select Create Spreadsheet Row (or your preferred action) as the action event.
- Connect your Google account.
- Select the spreadsheet and worksheet where the contact information should be added.

Step 5: Map your fields
Match the fields in the destination application with the corresponding Seamless fields.
For example:
- First Name → Seamless First Name
- Last Name → Seamless Last Name
- Email → Seamless Email
- Phone Number → Seamless Phone
- Job Title → Seamless Title
- Company Name → Seamless Company Name
- Company Website → Seamless Company Website
Fields marked as required must be completed before you can finish configuring the action.
Make sure you select dynamic Seamless fields rather than manually entering a contact’s information. Manually entered information will remain the same each time the Zap runs.

Step 6: Test the action
Test the action and confirm that the information appears correctly in the destination application.
Important: Testing an action may create a real contact, row, task, notification, or other record in the destination application.
Review the test record before publishing your Zap.
Step 7: Publish the Zap
After successfully testing the workflow:
- Review the trigger, action, connected accounts, and mapped fields.
- Select Publish.
- Confirm that the Zap is active.
Once published, the Zap will process new contacts that meet your trigger criteria.
Records researched before the Zap was published will not automatically be transferred through the Zap.
Prevent duplicate records
Zapier’s trigger prevents the same trigger event from repeatedly running within an individual Zap. However, the destination application may still create duplicate records.
When supported by the destination application, consider using an action such as:
- Create or Update Contact
- Find or Create Contact
- Find Record
- Update Existing Record
Using a contact’s email address as the identifying field can help the destination application locate an existing contact before creating a new one.
You should test your workflow to confirm how the destination application handles records that already exist.
Review Zap activity
You can review completed and unsuccessful workflow runs from Zap History in Zapier.
Zap History can help you review:
- The record that triggered the Zap
- Information sent from Seamless
- Information received by the destination application
- Error messages
- Duplicate or unexpected records
- Failed action steps
Because Zapier is a third-party platform, issues involving Zap configuration, Zap History, task usage, destination-app behavior, or Zapier account permissions may require assistance from Zapier or the destination application’s support team.
Share the Zap with your team
Sharing a Zap and sharing an application connection are separate actions in Zapier.
Application connections are private by default. When collaborating with other Zapier users, confirm that the appropriate team members have access to:
- The Zap
- The Seamless connection
- The destination application connection
The owner of the Zap must have access to every application connection used by the workflow. Removing access to a required connection may prevent the Zap from running.
Only share application connections with users who should be able to access or update information through those connected accounts.