Shared Contacts
The Shared Contacts feature in Seamless lets teams instantly see when a contact has already been researched by another user in their organization. This visibility improves collaboration, reduces duplicate outreach, and ensures everyone works from the same, accurate contact data. Learn how to identify shared contacts, manage visibility in searches, and filter your My Contacts view for seamless team coordination.
The Shared Contacts feature in Seamless allows users within the same organization to see if a contact has already been researched by another teammate. This visibility helps teams avoid duplicate research and gives insight into who originally engaged with a contact, the Contact Owner.
What Are Shared Contacts?
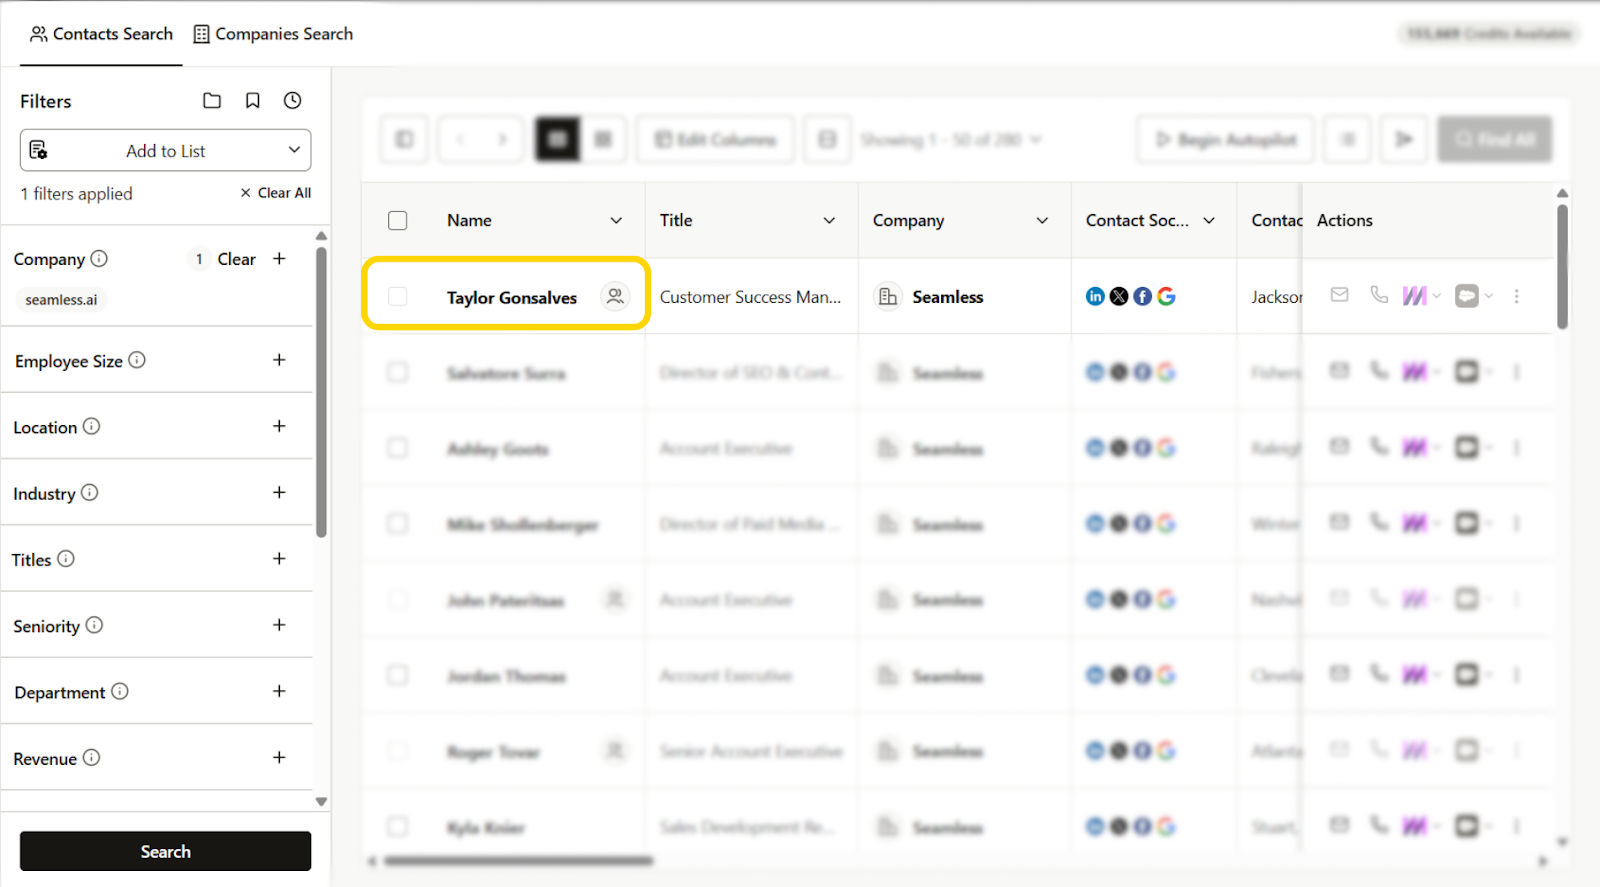
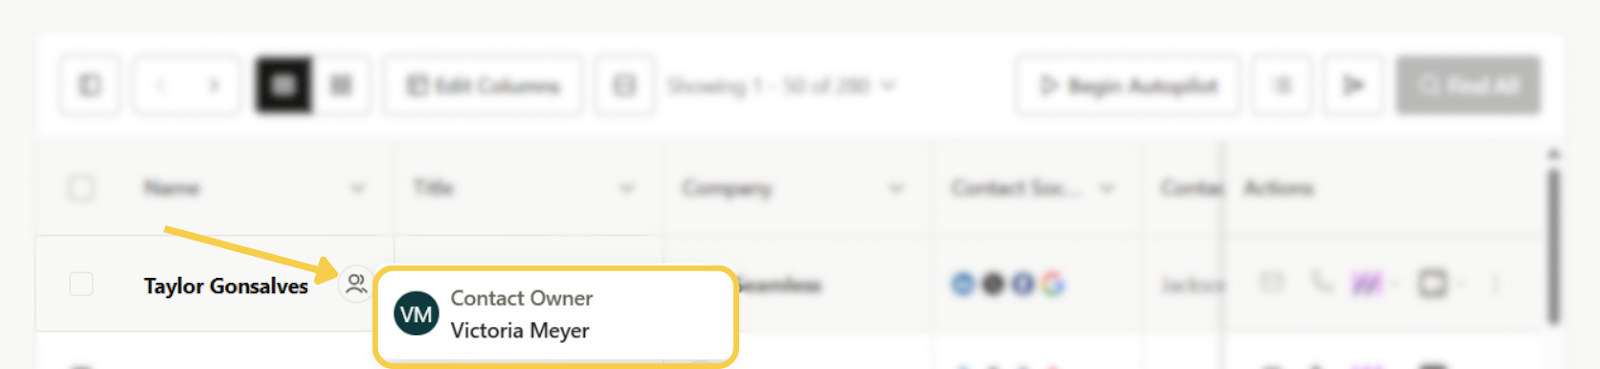
When you search for contacts in Seamless or view your My Contacts page, any contact that has already been researched by another user in your organization will display a Shared Contacts icon 👤 next to their name.
Hovering over this icon provides key details about that contact, including:
- Contact Owner - The teammate who first researched the contact
Shared Contacts help your team stay aligned, reduce overlap, and give visibility into existing outreach efforts across your org.
If a contact was previously found by a teammate, you will see their profile already in a found, “researched,” state. No additional credits are used for this researched contact to appear in your results and My Contacts page.
Using Shared Contacts in Contact Search
1. Search as Usual
When performing a Contact Search, you’ll see your results in the familiar dynamic table layout.
By default, Shared Contacts will be included in your search results.
2. Identify Shared Contacts
In the Name column, look for the 👤 Shared Contacts icon next to any contact that has already been researched by another teammate.
- Hover over the icon to view who the contact belongs to (the Contact Owner) and the relevant activity dates.
- Click the contact’s name to open their flyout profile, and look in the Manage section for more detail
Shared Contacts in “My Contacts”
The My Contacts page includes two key columns related to shared visibility:
- Date Researched - The date you (or another user) first researched that contact.
- Contact Owner - The name of the teammate who first researched that contact.
You can filter your contacts by Contact Owner to:
- View only contacts you’ve researched.
- View contacts researched by specific teammates.
- View all shared contacts across your organization.

Use Case Example: Preventing Duplicate Outreach
Imagine your SDR researches a decision maker at Acme Corp and adds them to her contacts list. A week later, another rep searches for the same contact while building a new list.
Thanks to Shared Contacts, Jordan instantly sees the 👤 icon next to that contact’s name. Hovering over it shows Ava as the Contact Owner, along with when she first reached out and when the last contact occurred.
Instead of reaching out again or duplicating work, the two reps can coordinate, review previous notes and call history in the contact flyout, and decide whether to re-engage or move on to new prospects.
This feature keeps everyone aligned, reduces overlap, and helps your entire team maintain clean, accurate outreach data.
Managing Shared Contacts Settings
Owners and approved admins can control how shared contacts are viewed and managed across their organization from the Contact Management page under Company Settings.
This section lets you set visibility access levels and define contact ownership expiration.
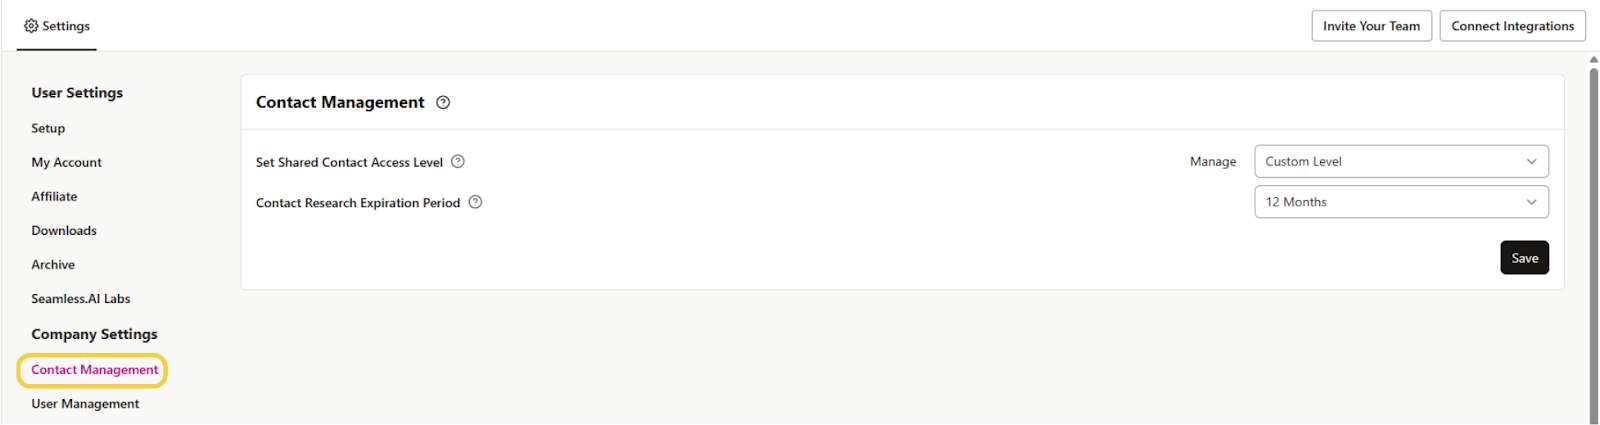
Shared Contact Access Levels
You can choose how much shared contact data each user or group can see:
- User - View only their own researched contacts.
- Group - View contacts researched by members of their assigned group.
- Organization - View all shared contacts across the company.
- Custom - Set specific visibility rules per user.
Custom access is great for managers who need visibility across multiple teams.
Contact Research Expiration
Set how long a user retains ownership of a contact before it becomes available to research again.
Options include None, 90 days, 180 days, 365 days, or 730 days.
- Choose None to keep ownership indefinitely.
- Choose a time period to refresh ownership automatically and keep data current.
Why It Matters
These settings help teams stay organized, maintain clean ownership rules, and keep contact data fresh across the entire organization.