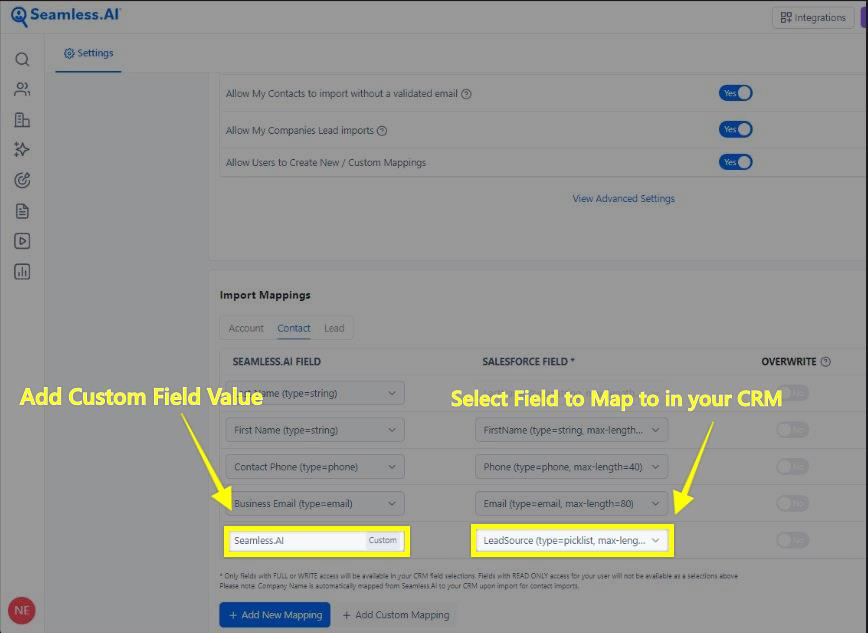
How to create a Custom Mapping for your CRM
Custom mappings can be utilized to map a static or set value into your CRM to ensure that you can have information sent in to your system given it is a required field and it does not line up with a Default Seamless field.
Brand refresh in progress
We recently launched a new brand, so some images and videos may differ from what you see in-product. All workflows and guidance remain accurate while we update visuals.
Custom mappings can be utilized to map a static or set value into your CRM to ensure that you can have information sent in to your system given it is a required field and it does not line up with a Default Seamless field.
1. Click on the User Icon in the bottom left hand corner followed by Settings and CRM Setup.

2. Scroll down to the bottom of the page and click the "Create Custom Mapping" button. From here a Static value can be filled out within the Seamless.AI Field section and a field to import this value into can be selected from your CRM fields.